Steps To Do-It-Yourself Paved Stone Pathway
5 min read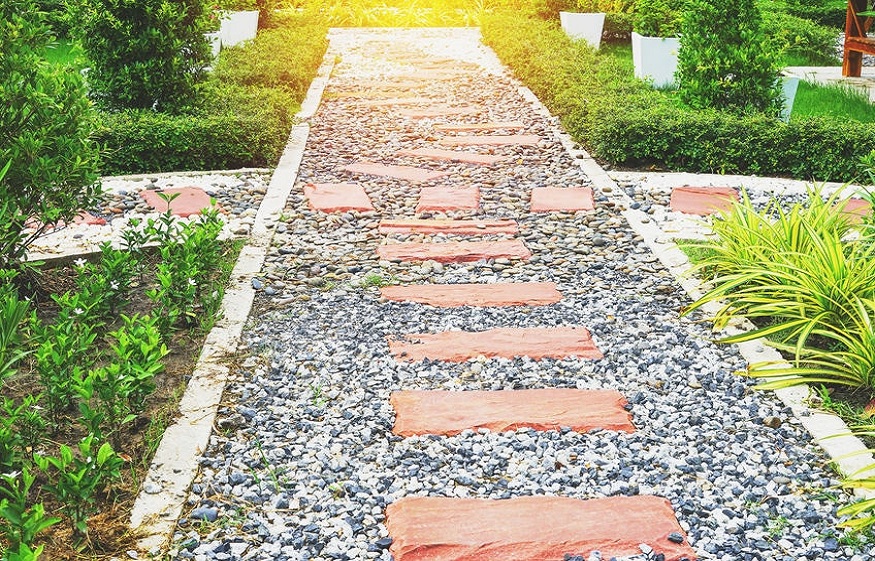
Introduction
Paved stone pathways are amazing. They look brilliant, can stand up to a lot of foot traffic, and are easy to repair. They are also better for the environment compared to traditional options and give your yard or garden an organic look. You can search for “paving companies near me” and hire pros to build one for you. Otherwise, you need to use the following steps to do it yourself.
The Steps
1. Choose a simple design
When you search for paved stone pathways on any search engine, you’ll come across thousands of results. Some of them are exquisite with complex structural designs and some exotic materials as the sub-base. Others seem like portraits that deserve to be gawked at instead of walked over. However, to you these are distractions.
You need to choose a fairly simple pathway design so that you can build it yourself. Exquisite designs require years of experience, expensive machinery, and industrial skills to be executed. You don’t have those things when you’re trying to build a paved stone pathway for yourself. That’s why you need to stick with a simple design that could be done without any experience or special skills. Even the simplest paved stone pathway looks several times better compared to pathways made from concrete, asphalt, or even timber.
2. Get the dimensions
When you’re building any pathway, you need to get the dimensions right to execute everything accurately and not waste materials. The standard pathway is around 3 feet wide and 20 feet long and the following instructions are for building such a path. If you have a property that requires a smaller or larger pathway, you can easily scale the measurements up or down to suit your needs. Begin by figuring out the square footage of your space. Simply calculate the length and width of the pathway you want to build.
For the standard pathway that’s 20 feet long and 3 feet wide, the square footage or area comes up to 60 square feet. To cover that area, you’ll need around 28 12inch by 12-inch paver stones or more. The pavers would be installed as pairs with a gap of 6 inches between them to keep things simple. On the other hand, the gap between the pavers and the edge of the walkway is around 3 inches. You can change or alter those gaps to create a staggered effect without raising the complexity of this build.
3. Prep the space
You need to prepare the space for the future pathway before you can start laying down pavers. Plot out the path and clear away grass up to a depth of 4 or 6 inches. You can leave the rest of the roots in the soil to maintain good soil structure. Next, use stakes and strings to mark out the course of the pathway along with the elevation of the path. Next, use a special upside-down marker spray paint to outline the edge of the pathway. This can be removed later on or covered with green cover or soil after the pathway is built. After outlining the edge, use a tiller or shovel to clear out the area.
4. Fill in the paver base
After you clear out the area for the pavers, you need to fill it up with a paver base. Fill in the marked path with a paver base. Make sure it is at least 4 inches deep. To cover around 60 square feet, you’ll need anywhere from 40 to 50 bags of paver base. You can scale up this figure and order more materials if you have a larger pathway. Once the paver base is in place and up to the right depth, use a tamper to level it out. If you’re building a larger pathway, consider renting a powered tamper to get the job done quickly without exhausting yourself.
5. Fill in leveling sand
With the paver base filled and leveled, you need to add leveling sand. You may use polymeric sand or any other type of leveling sand depending on the paver stone you choose. Polymeric sand allows for a tighter fit with the pavers. However, if you’re building a simple pathway with widely spaced paver stones, polymeric sand may not be the best choice. It’s best to ask the staff at the store for a recommendation while you’re shopping for materials. After sourcing your sand, apply it up to a depth of 1 inch. You may need anywhere from 10 to 15 bags for covering 60 square feet. Next, tamper the sand down to secure it.
6. Measure and lay out the pavers and sand them
When the leveling sand is secured in place, sketch the pattern for your paver stones. A simple layout sketch in a notebook would help. You don’t need to do designs on the computer. Next, use your measuring tape and lay out the paver stones. Be careful and check the distances and gaps accurately as you lay each paver stone. Once the pavers are in place, add residual leveling sand and spread it across the pavers. You don’t need a lot, so no need to go overboard. Use a push broom to sweep the sand in between the pavers and spread them evenly.
7. Fill in the spaces
When the sand is added to the pavers, fill in the gaps between the pavers and the edges with a material you like. It can be anything from pea pebbles to gravel stones. Choose a material that is the opposite tone of the stone paver to create an interesting contrast. If you plan to make a pathway with tighter paver spacing and gaps that don’t exceed a few millimeters, you can use leveling sand as the filling material.
Conclusion
Paved stone pathways are nothing new. They have been used in parks for centuries and have become more affordable over the years. However, they are still much more expensive than traditional options like concrete. You can manage to get a paved stone pathway within a tight budget if you build it yourself. Otherwise, you need to search for “paving companies near me” and let the professionals handle the job.